Follow Me On Social Media!

Chocolate Rolls: Irresistibly Soft and Decadently Delicious
Introduction to Chocolate Rolls
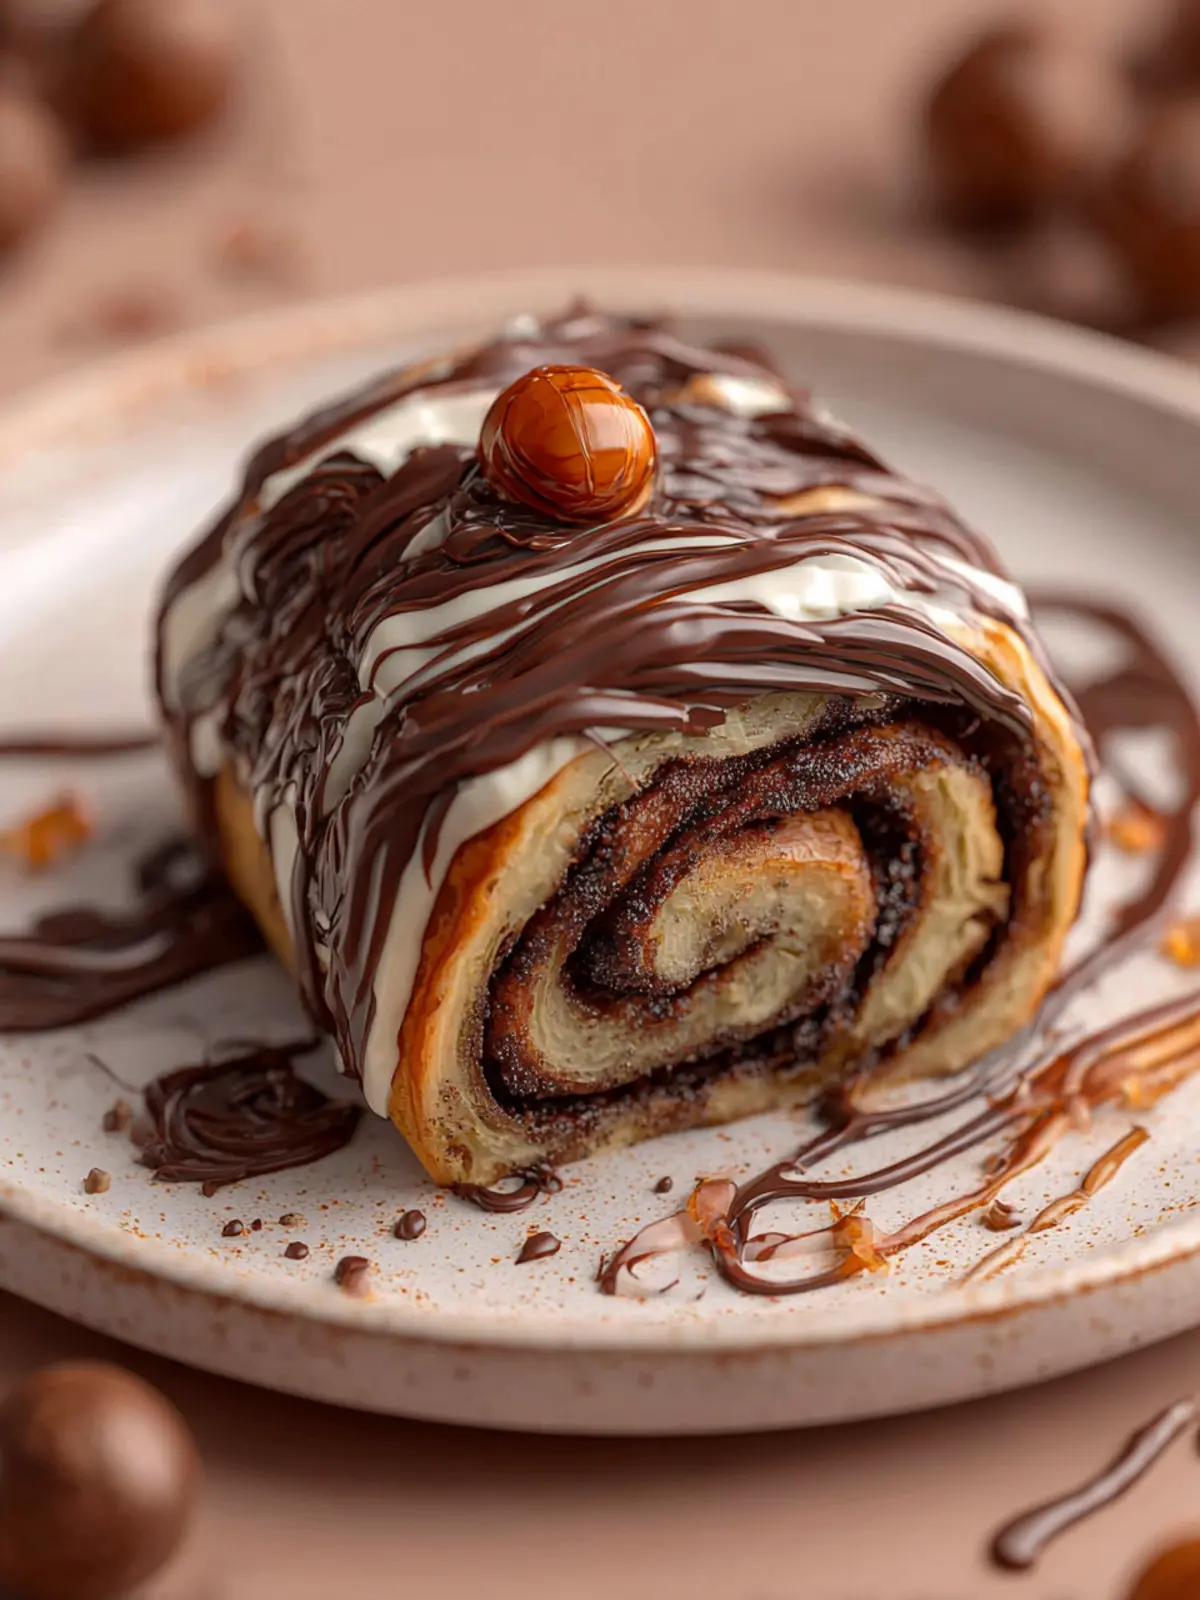
Imagine indulging in a dessert that combines the rich, velvety flavor of chocolate with the comforting nostalgia of a freshly baked roll. Chocolate rolls, with their soft texture and decadent filling, transport you to a world of sweetness with each bite. These delightful treats invite you into the kitchen, where the alluring aroma of baking chocolate fills the air, making it impossible to resist. Whether you’re hosting a gathering or simply treating yourself, chocolate rolls promise to elevate any moment into something special.
What makes Chocolate Rolls a must-bake treat?
Chocolate rolls are not just any dessert; they are a celebration of flavors and textures. Here are a few reasons you’ll want to add these rolls to your baking repertoire:
-
Versatile Delight: These rolls can be enjoyed warm straight from the oven or at room temperature the next day, making them perfect for both spontaneous snacking and planned gatherings. You can even warm them up for an extra touch of indulgence!
-
Customizable Fillings: While chocolate is the star, the fillings can be adjusted according to your taste. Consider adding nuts, caramel, or even a hint of orange zest to tantalize your palate. The possibilities are endless, so feel free to get creative!
-
Perfect for Sharing: Slice them up and share with friends, or package them up as gifts. There’s something intimate about sharing homemade treats that brings people together, whether it’s a cozy evening at home or a lively brunch with friends.
-
Easy to Make: Even if you’re new to baking, chocolate rolls are relatively simple to create. The basic steps are straightforward, allowing you to gain confidence in the kitchen while whipping up something spectacular.
-
Nostalgic Comfort: These rolls remind us of warm family gatherings and cherished memories. With each bite, you can relish the comfort of past moments while creating new ones with your loved ones.
Convinced? Let’s dive into the ingredients that will help you create these irresistible chocolate rolls!

Key Ingredients for Chocolate Rolls
Chocolate rolls are not just a treat; they’re a delightful experience that whisk you away to a world of indulgence with every bite. To achieve that perfect balance of sweetness, texture, and rich chocolate flavor, here’s a look at the key ingredients that will make your chocolate rolls a hit at any gathering.
-
Flour: All-purpose flour is the backbone of this recipe. It provides the structure necessary for the rolls, ensuring they rise beautifully without becoming too dense.
-
Cocoa Powder: Using unsweetened cocoa powder adds an intense chocolate flavor that truly elevates the rolls. It’s essential to use a high-quality cocoa for the best results.
-
Sugar: Granulated sugar brings the sweetness factor while allowing the chocolate to shine. Balancing the sugar level is crucial; too much can overwhelm the chocolate taste.
-
Butter: I find that unsalted butter adds a rich, creamy flavor to the dough. It also helps keep the rolls moist and tender.
-
Yeast: This essential ingredient is what makes your chocolate rolls light and fluffy. Fresh yeast works wonders, but active dry yeast can also do the trick with some minor adjustments.
-
Milk: Warm milk is crucial for activating the yeast and enriching the dough. It also adds a lovely softness to the finished rolls.
-
Eggs: Eggs are included for richness, flavor, and to aid in the leavening process. They help bind everything together beautifully.
By using these key ingredients thoughtfully, you’ll create chocolate rolls that are decadent, soft, and perfectly chocolatey. Happy baking!
Why You’ll Love These Chocolate Rolls
Nothing quite captivates the heart like warm, gooey chocolate rolls. Imagine the aroma wafting through your kitchen as they bake—it’s the kind of comfort that feels like a warm hug after a long day.
Indulgent Flavor in Every Bite
These chocolate rolls are made from a soft, pillowy dough that envelops a rich chocolate filling. Each roll is a little treasure, bringing a perfect balance of sweetness and decadence. Whether you’re enjoying them alongside your morning coffee or as a comforting evening treat, these rolls never disappoint.
Simple and Satisfying
One of the best things about these rolls is how easy they are to make. With straightforward ingredients and simple steps, even beginner bakers will find joy in the process. A few countertop moments transform into a delightful baking experience, and before you know it, you’ll be sinking your teeth into deliciously warm rolls.
Perfect for Sharing
These chocolate rolls are ideal for gatherings or cozy weekend mornings. They invite connection and conversation, whether you’re whipping them up for friends or simply savoring them solo. There’s something so satisfying about pulling apart a warm roll and watching the chocolate ooze out—a true crowd-pleaser that will leave everyone asking for the recipe.

Tips for Making Perfect Chocolate Rolls
Creating delectable chocolate rolls can sometimes feel a bit daunting, but with a few simple tips, you’ll transform this recipe into an irresistible masterpiece. Imagine pulling fresh rolls from the oven, the aroma of chocolate filling your kitchen, while family and friends gather ’round to indulge. Here’s how to make those moments happen!
Quality Ingredients Matter
- Chocolate: Opt for high-quality dark chocolate to achieve a rich flavor. You deserve the best, and this small choice makes a big difference in your chocolate rolls.
- Butter: Using unsalted butter allows you to control the saltiness. Melt it to enhance the flavor and ensure a smooth dough.
- Flour: All-purpose flour works perfectly, but make sure to measure it correctly. Too much flour can make your rolls dense and dry.
Mastering the Dough
- Knead Gently: Kneading the dough until just combined helps maintain its tenderness. Overworking it can lead to tough rolls!
- Resting Time: Don’t skip the resting phase. Letting the dough rise until doubled in size guarantees a light and airy texture.
Consider the Baking
- Temperature Check: Always preheat your oven to the right temperature for even baking. An oven thermometer can ensure accuracy.
- Watch for Doneness: Your rolls should be golden brown. If they’re getting too dark but not fully cooked, cover them loosely with aluminum foil.
With these tips in hand, you’ll be well on your way to baking perfect chocolate rolls that will impress everyone at your next gathering!
Time Breakdown for Making Chocolate Rolls
Creating chocolate rolls is an exciting adventure that fills the kitchen with rich, warm aromas. Understanding how long each step takes will make your baking experience smoother and more enjoyable. Here’s a simple breakdown of the time you’ll need:
Preparation time
The preparation for your chocolate rolls will take about 20 minutes. This includes gathering your ingredients, mixing the dough, and preparing any fillings.
Rising time
Allow your dough about 1 to 1.5 hours to rise. This is the time it takes for the yeast to work its magic, creating those delightful rolls that you can’t wait to enjoy.
Baking time
Baking the chocolate rolls usually takes around 25 to 30 minutes. Keep an eye on them—nothing says indulgence quite like the sight of golden-brown rolls emerging from the oven.
Total time
All together, you’re looking at approximately 2 to 2.5 hours from start to finish. But trust me, that time is well worth the end result!

Nutritional Information for Chocolate Rolls
When indulging in chocolate rolls, it’s essential to understand what you’re savoring. These delightful treats are not just about irresistible taste; they also hold various nutritional aspects to consider while enjoying them in moderation.
Calories
A single serving of chocolate rolls contains approximately 250 calories. This can vary based on the specific ingredients and portion sizes used in your recipe. If you’re counting calories, keeping a close eye on serving sizes can help you indulge guilt-free.
Protein
Each serving typically offers around 5 grams of protein. While this is not a huge source of protein, it’s a nice addition when paired with a balanced meal or snack. Pairing your chocolate rolls with a source of protein, like a glass of milk or some nuts, can elevate your overall nutritional intake.
Sodium
The sodium content in chocolate rolls is generally around 200 mg per serving. This amount contributes to your daily intake, so if you’re watching your sodium levels, consider enjoying these scrumptious rolls as an occasional treat rather than a daily staple. Moderation is key for maintaining a balanced diet while still satisfying your sweet tooth!
FAQs about Chocolate Rolls
Creating perfect chocolate rolls can be both a delightful and challenging experience. Whether you’re a seasoned baker or a curious novice, it’s essential to know the ins and outs of making these sweet treats. Let’s dive into some common questions that you might have!
How do I ensure my rolls are soft and fluffy?
To achieve irresistibly soft and fluffy chocolate rolls, the secret lies in your kneading and rising techniques. Be sure to knead the dough until it’s smooth and elastic, which usually takes about 5-7 minutes. Additionally, letting the dough rise in a warm, draft-free area will create the perfect environment for the yeast to work its magic. Cover the dough with a damp cloth while it rises to maintain moisture.
Can I make the dough ahead of time?
Absolutely! You can prepare the dough in advance. Once you knead it, let it rise once. Then, after shaping your rolls, you have two options: either refrigerate them overnight or freeze them for future baking. If you refrigerate, let them sit at room temperature for about 30 minutes before baking. For frozen rolls, just verify they are fully thawed before baking.
What should I do if my dough doesn’t rise?
If your chocolate rolls dough isn’t rising, it could be due to inactive yeast. Ensure your yeast isn’t expired, and check that you used warm rather than hot water. A simple fix is to create a warm environment; try placing the bowl in the oven (turned off) with just the light on. If the dough still doesn’t rise, it’s better to start over for the best results.
How can I store leftover chocolate rolls?
To keep your chocolate rolls fresh, allow them to cool completely, then place them in an airtight container at room temperature for up to three days. For longer storage, consider freezing them. Wrap each roll tightly in plastic wrap and then in aluminum foil, ensuring they stay fresh for up to three months. Just thaw at room temperature when you’re ready to enjoy again!
Conclusion on Chocolate Rolls
To wrap up our delightful adventure into the world of chocolate rolls, it’s clear that this treat is more than just food—it’s a sweet experience waiting to be made in your kitchen. These rolls, infused with rich chocolate and fluffy dough, bring warmth and joy to any gathering. They are versatile enough for a weekday snack or to impress at a dinner party. Imagine the smiles as you serve them fresh from the oven! So, why not embrace your baking spirit and let your creativity shine? There’s nothing better than sharing these delicious chocolate rolls with friends and family. Happy baking!
Print
Cinnamon Rolls
- Total Time: 2 hours
- Yield: 12 rolls 1x
- Diet: Vegetarian
Description
Delicious homemade cinnamon rolls with a chocolate filling and glaze.
Ingredients
Scale
- 1 cup (240 ml) milk (lukewarm, about 120-130°F)
- 2 ¼ teaspoons instant yeast
- ⅓ cup (100 g) granulated sugar (divided)
- 2 large eggs (room temperature)
- 6 Tablespoons (85 g) unsalted butter (melted and slightly cooled, not hotter than 110°F)
- 4–5 cups (480 – 600 g) all-purpose flour (spooned and leveled)
- 1 teaspoon salt
- ½ cup (113 g, 1 stick) unsalted butter (softened to room temperature)
- ½ cup (64 g) powdered sugar
- ¼ cup (21 g) Dutch-process cocoa powder
- ½ teaspoon vanilla extract
- 4 ounces semi-sweet or bittersweet chocolate (chopped)
- 1 cup (113 g) powdered sugar (for glaze)
- ¼ cup (21 g) Dutch cocoa powder (for glaze)
- ½ teaspoon vanilla extract (for glaze)
- 3–4 Tablespoons milk (or heavy cream, for glaze)
Instructions
- Proof yeast. In your stand mixer, or large bowl, stir together the warmed milk, yeast, and 1 teaspoon of the sugar. Let sit for 5-10 minutes until the yeast mixture becomes foamy and bubbly.
- Make dough. In a bowl of your stand mixer with a paddle attachment, add in the eggs and melted butter and stir to combine. Then add in the rest of the sugar, flour, and salt, and stir to combine until a shaggy dough comes together.
- Knead the dough. Fit the mixer with a dough hook attachment, and knead at medium speed for 6-8 minutes. If the dough is super sticky, add additional flour a little at a time if needed. If you are kneading the dough by hand, then turn the dough out onto a lightly floured surface and knead for 8-10 minutes by hand.
- Let the dough rise. Lightly grease a large bowl, and place dough into the bowl, turning once to coat. Cover the bowl and allow it to rise until doubled in size, about 1 to 1 1/2 hours.
- Prepare Pan. Grease a 9×13 baking pan with non-stick spray or butter.
- Make filling. Place butter, sugar, cocoa, and vanilla in a mixing bowl and beat until combined. It should be a very soft paste that you will be able to spread easily.
- Roll out the dough. Turn the dough out onto a lightly floured surface, and roll out the dough into a 18×12 inches rectangle.
- Spread filling. Spread the dough with the softened butter mixture leaving about a ½-inch border at the top long edge. Sprinkle the chopped chocolate over the butter, pressing down lightly to adhere.
- Cut rolls. Starting on the long edge with filling, roll up the dough tightly into a log. Pinch the dough to seal. Using a serrated knife cut the log into 12 equal rolls.
- Place rolls into the pan spiral side up. Cover the baking dish and let rise in a warm, draft-free place for 45 minutes until the rolls are slightly puffy and nearly doubled in size.
- Bake rolls. Near the end of the second rise time, position a rack in the center of your oven and preheat the oven to 350°F/177°C. Bake rolls in the preheated oven for 30-35 minutes until golden brown.
- Let cool in the pan for about 20 minutes, then spread glaze on.
- Make the glaze. In a small bowl whisk together the powdered sugar, cocoa powder, vanilla and milk. Adjust the consistency if needed by adding a bit more milk. Spread on top of the cinnamon rolls.
Notes
- Do not over-knead the dough or it will become dense and chewy.
- For the best results, use room temperature ingredients.
- You can use dental floss to cleanly cut the rolls.
- Prep Time: 30 minutes
- Cook Time: 35 minutes
- Category: Dessert
- Method: Baking
- Cuisine: American
Nutrition
- Serving Size: 1 roll
- Calories: 300
- Sugar: 15g
- Sodium: 150mg
- Fat: 10g
- Saturated Fat: 6g
- Unsaturated Fat: 3g
- Trans Fat: 0g
- Carbohydrates: 45g
- Fiber: 2g
- Protein: 5g
- Cholesterol: 70mg