Follow Me On Social Media!


Granola Bars That Wow: Easy, Chewy, and Totally Addictive
Introduction to Granola Bars
The allure of granola bars goes far beyond their delightful taste; they embody the perfect blend of convenience and nutrition, crafted with wholesome ingredients that cater to the fast-paced lifestyles of busy professionals. Imagine waking up on a hectic morning, dashing to the office, and simply grabbing a homemade granola bar from your pantry—it’s not just a snack; it’s your fuel for a productive day ahead. When I first ventured into the world of creating my own granola bars, I was on the hunt for a quick, nutritious option that could easily fit into my busy routine, and I quickly discovered just how versatile and satisfying they could be.
Homemade granola bars offer you the freedom to customize flavors and ingredients, ensuring they perfectly match your tastes and dietary needs. Whether you prefer a nutty crunch or a chewy, fruity bite, there’s a recipe waiting to be crafted in your kitchen. With the right balance of oats, nuts, and sweeteners, these bars can be your go-to snack that keeps you energized throughout the day.
What makes homemade granola bars a staple for busy professionals?
-
Convenient Energy Boost: In the midst of back-to-back meetings or a hectic workday, having a granola bar on hand means you can quickly refuel without resorting to unhealthy snacks. They provide essential nutrients, helping you maintain focus and energy.
-
Cost-effective Alternative: Pre-packaged granola bars can be surprisingly pricey and often include unwanted preservatives. By making them at home, you can save money and control exactly what goes into them.
-
Easy to Personalize: Are you a chocolate lover? Or do you crave something fruity? The flexibility in ingredient choices allows you to incorporate your favorite flavors, making each batch uniquely yours.
-
Health-Conscious Options: With increasing dietary awareness, homemade granola bars can cater to various needs—gluten-free, low-sugar, or high-protein, depending on your lifestyle preferences.
In a world where time is often scarce, homemade granola bars serve as a delicious solution to stay nourished and satisfied. Why not give them a try? You might just find that they become a staple in your own kitchen.
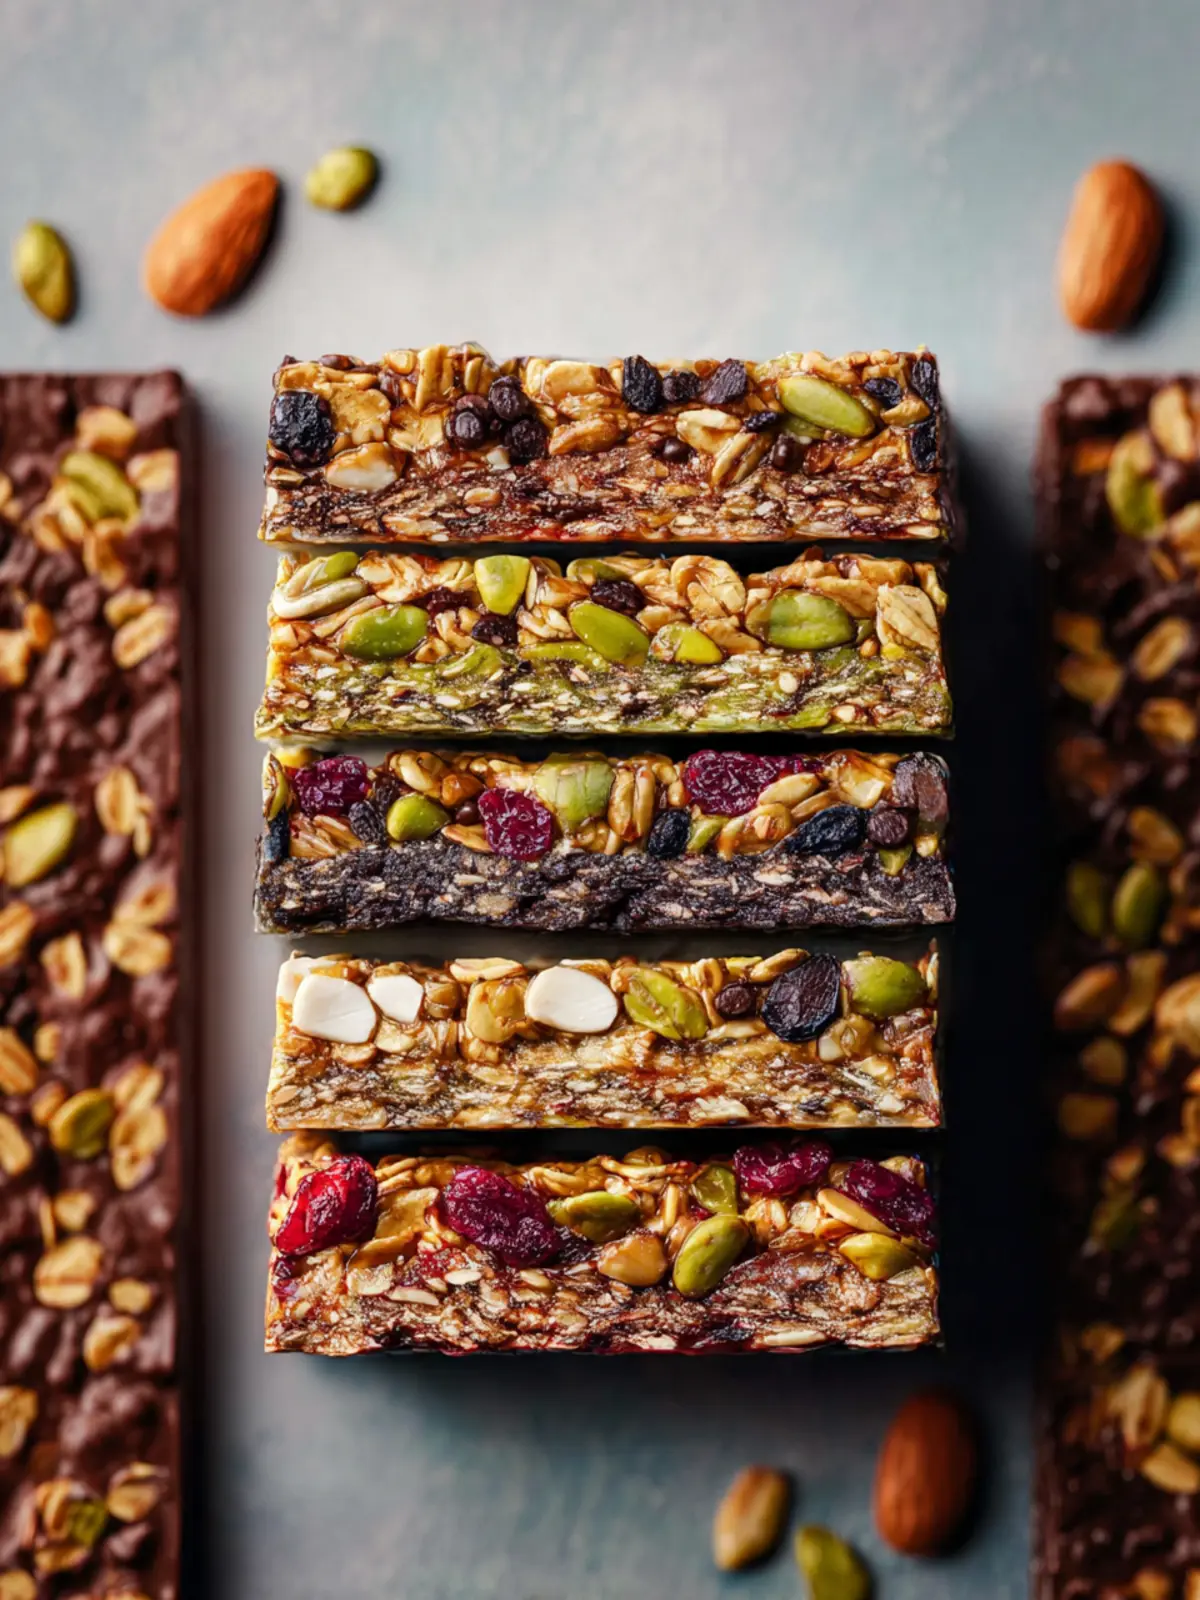
Key Ingredients for Granola Bars
Creating delicious granola bars is all about selecting the right ingredients that harmonize beautifully. When I first experimented with making these bars, I quickly realized that each ingredient contributes to the flavor, texture, and nutrition.
-
Oats: Rolled oats serve as the foundation. They provide a wholesome base packed with fiber and nutrients, making your granola bars hearty and filling. I’d recommend using whole-rolled oats for that perfect chewy texture.
-
Nuts and Seeds: Add your favorite nuts like almonds, walnuts, or pecans, along with seeds such as sunflower or pumpkin seeds. These ingredients not only enhance the flavor but also offer healthy fats and protein.
-
Sweeteners: For binding and sweetness, I use a mix of honey or maple syrup and a touch of brown sugar. This combination gives the bars a delightful caramel flavor while holding everything together.
-
Nut Butter: Creamy nut butter, like almond or peanut butter, contributes richness and ensures that every bite is satisfying. It also acts as a glue for the dry ingredients.
-
Mix-ins: Feel free to customize with dried fruits like cranberries, raisins, or chocolate chips—just remember they add sweetness and texture, making these granola bars your own unique creation.
Why You’ll Love This Recipe
Imagine biting into a homemade granola bar, where every chew rewards you with a delightful mix of flavors and textures. This recipe is more than just a way to satisfy your snack cravings; it’s a wholesome way to fuel your day. If you’re like many young professionals juggling busy schedules, you’ll appreciate how easy it is to whip up a batch of these granola bars in advance, making them the perfect grab-and-go solution for breakfast or a midday boost.
A Healthier Alternative
You might be surprised to learn that many store-bought granola bars are loaded with sugars and questionable additives. With this recipe, you control every ingredient, tailoring it to your taste and nutritional preferences—whether you prefer a nutty crunch or a fruity burst of flavor.
Versatile and Customizable
What’s truly exciting about these granola bars is their versatility. You can swap out nuts, seeds, or dried fruits based on what you have on hand or what you’re in the mood for. This not only keeps things interesting but also ensures each batch is uniquely yours.
Kid-Friendly and Family Approved
Don’t be surprised if your kids love these as much as you do! They’re perfect for lunchboxes and after-school snacks. Plus, getting your family involved in making them can turn snack prep into a fun bonding activity.
In short, this granola bar recipe is a delightful fusion of taste, health, and convenience that you’ll find yourself coming back to time and again.
Variations
Granola bars can be a canvas for your culinary creativity, allowing you to tailor each batch to your personal taste or dietary needs. When you whip up a batch of homemade granola bars, the possibilities are truly endless.
-
Nut Choices: Switch up the nuts! While almonds are a classic, try using walnuts or pecans for different flavors and textures. Nut butter can also add a unique touch—consider using cashew or sunflower seed butter for a twist.
-
Fruits: Dried fruit enhances sweetness naturally. Experiment with cranberries, apricots, or even mango for a tropical flair. Fresh fruits like bananas or apples can also be mixed in for a refreshing change, though they might require adjustments in your drying time.
-
Sweeteners: Substitute honey with maple syrup or agave nectar for a vegan-friendly option. You might even consider using coconut sugar for a lower glycemic alternative.
Each of these adjustments can make your granola bars a new experience every time you bake them, ensuring you never tire of this wholesome snack!
Cooking Tips and Notes
Creating your own granola bars at home can be a delightful experience, transforming simple ingredients into a satisfying snack. Here are some essential cooking tips and notes to ensure your granola bars turn out perfectly!
Ingredient Substitutions
- Oats: Opt for rolled oats for that chewy texture. Quick oats can work in a pinch, but they may yield a softer bar.
- Sweeteners: Honey and maple syrup are my go-tos! They not only sweeten your bars but also help bind the ingredients. If you’re vegan, agave syrup is a great alternative.
Binding Ingredients
- Nut Butter: Using creamy nut butter, like almond or peanut, is crucial. It not only enhances flavor but also keeps everything together. Just a tip: if your nut butter is too thick, warm it slightly to make mixing easier.
Flavor Boosts
- Add-Ins: Feel free to get creative! Dried fruits, seeds, or even a touch of dark chocolate can elevate your granola bars to the next level. Just remember, balance is key; too many mix-ins can affect the bar’s texture.
Baking Tips
- Press Firmly: When pressing the mixture into the pan, ensure you pack it down tightly. This helps the bars hold together better after baking.
- Cooling Time: Allow your granola bars to cool completely before cutting. This patience is essential for achieving clean edges.
By following these simple tips, you’re bound to create delicious granola bars that not only taste great but also keep you energized throughout the day!
Serving Suggestions
When it comes to enjoying your homemade granola bars, the possibilities for personalization are endless. First off, consider pairing these nutritious bars with your favorite toppings for an extra flavor kick.
-
Nut Butters: A dollop of almond or peanut butter on top makes for a satisfying protein boost while enhancing the nutty flavors of the bars.
-
Fresh Fruits: Slice some bananas or strawberries to complement your granola bars. Their natural sweetness balances beautifully with the wholesome ingredients.
-
Yogurt Dip: Serve with a side of Greek yogurt, drizzled with honey. The creaminess provides a delightful contrast to the crunchiness of the bars.
-
Trail Mix Variation: Crumble the granola bars into your morning bowl of yogurt or oatmeal, adding a delightful crunch and variety to your breakfast.
-
Portable Snack Packs: These bars are great for on-the-go snacking. Just grab one as you head out the door for an energy-boosting treat during busy workdays.
With these serving suggestions, your granola bars are bound to be a hit at any gathering or simply as a personal treat!
Time Breakdown
Preparation time
Getting your ingredients measured and ready for these granola bars takes about 10 minutes. It’s a quick and fun task—don’t rush it! You might even enjoy mixing and matching your favorite add-ins.
Cooking time
Once you’re set, pop them in the oven for about 25-30 minutes. The aroma of baking oats and nuts will create an irresistible atmosphere in your kitchen.
Total time
In just under an hour, you’ll have a delicious batch of granola bars. It’s the perfect way to boost your snack game, ensure you have a quick breakfast handy, or simply indulge in something wholesome. Enjoy the process!
Nutritional Facts
Calories
When you munch on a homemade granola bar, you’re getting a delightful, nutritious snack. On average, each bar contains about 200-250 calories, depending on the ingredients used. This makes them an ideal treat for a quick energy boost during your busy day—perfect for that mid-afternoon slump or after a workout!
Protein
One of the best aspects of homemade granola bars is their protein content. Each bar typically packs around 5-6 grams of protein, thanks to ingredients like nuts, seeds, and perhaps a touch of protein powder. This makes them not only tasty but also filling, helping you stay satisfied longer.
Sodium
Keeping an eye on sodium intake is essential, especially for young professionals on the go. Homemade granola bars can have as little as 50-100 mg of sodium per bar, especially when you control the amount of salt you add. This makes them a heart-healthy alternative to many store-bought snacks that often contain higher sodium levels.
By considering these nutritional facts, you can indulge in your homemade granola bars while still staying mindful of your health!
FAQs about Granola Bars
When you embark on the delightful journey of making homemade granola bars, it’s normal to have a few questions. These chewy, crunchy, and entirely customizable snacks can elevate your snacking game, but knowing how to properly store and enjoy them can enhance the experience even more. Here are some frequently asked questions to guide you.
How long do homemade granola bars last?
Homemade granola bars typically have a shelf life of about one week when stored in an airtight container at room temperature. However, for optimal freshness, I suggest consuming them within the first five days. If you notice any unusual odors or texture changes, it’s best to err on the side of caution.
Can I freeze granola bars?
Absolutely! Freezing granola bars is a fantastic way to extend their shelf life. Wrap each bar individually in plastic wrap, then place them in a freezer-safe bag or container. When you’re ready to enjoy one, simply allow it to thaw at room temperature for about 30 minutes. This way, you’ll always have a quick, healthy snack on hand!
What are some ingredient substitutions?
One of the joys of making granola bars is their versatility. If you’re out of an ingredient or have dietary restrictions, here are some smart substitutions:
- Sweeteners: Instead of honey or maple syrup, try brown rice syrup or agave nectar for a vegan-friendly option.
- Nuts: Almonds and walnuts can easily be swapped for seeds like sunflower or pumpkin seeds to accommodate nut allergies.
- Oats: If you need a gluten-free option, simply ensure you’re using certified gluten-free oats.
Experimenting with flavors can lead to delicious surprises, so don’t hesitate to get creative!
Conclusion on Granola Bars
In wrapping up our granola bars adventure, it’s clear that these treats offer both convenience and nutrition in every bite. Making your own granola bars allows you to customize flavors and ingredients, ensuring a healthier snack option tailored to your preferences. Whether you enjoy them during a busy workday or as a wholesome post-workout boost, these bars are a great way to nourish your body without sacrificing taste or enjoyment. With endless possibilities for flavor combinations, don’t hesitate to get creative and put your personal spin on this versatile recipe. Happy snacking!
Print
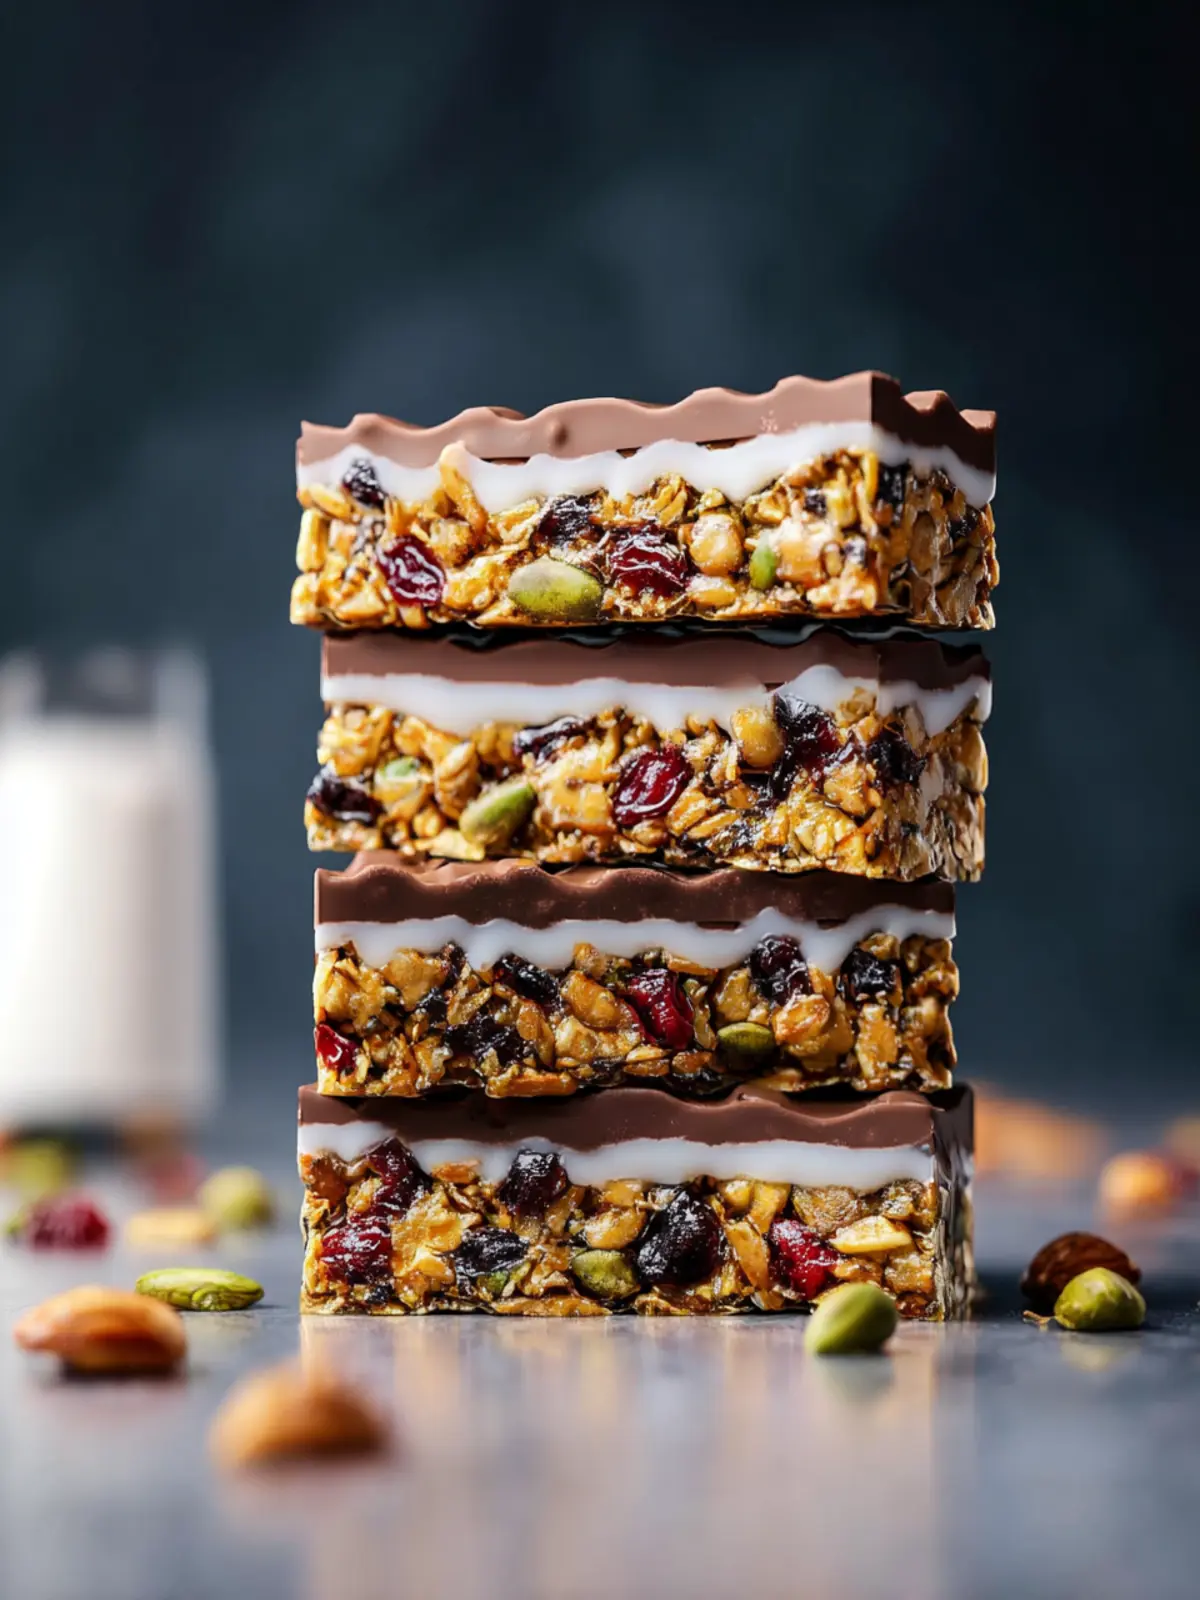
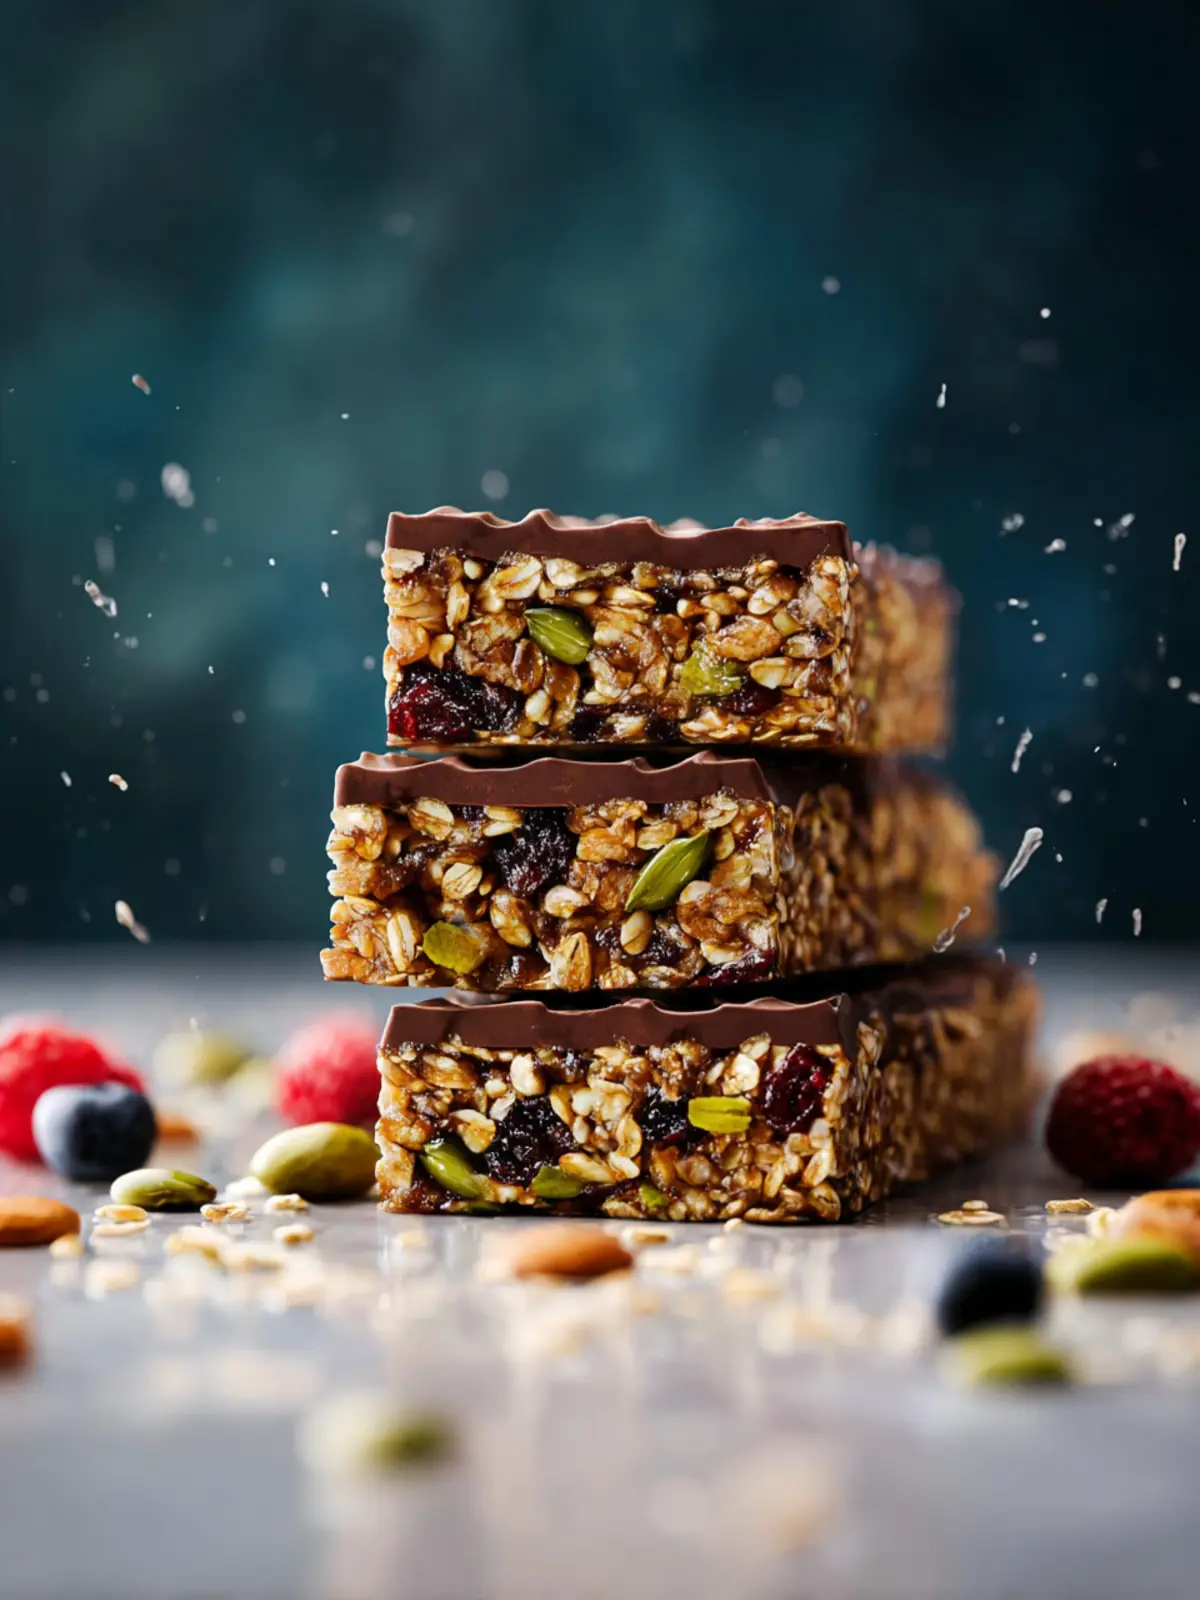
No-Bake Chocolate-Pistachio Bars
- Total Time: 30 minutes
- Yield: 16 bars 1x
- Diet: Vegetarian
Description
Delicious no-bake chocolate-pistachio bars made with wholesome ingredients.
Ingredients
Scale
- 1 cup packed pitted dates
- 1/3 cup creamy peanut butter
- 1/3 cup maple syrup
- 1 teaspoon vanilla extract
- 1/2 cup quick oats (the one-minute kind)
- 1 cup old-fashioned oats
- 3/4 cup roasted and salted pistachios (coarsely chopped)
- 1/2 cup mini chocolate chips
- 1 cup chocolate chips (dark or milk chocolate)
- 2 teaspoons coconut oil
Instructions
- Line an 8×8-inch pan with parchment paper or foil, adding an overhang for easy removal. Don’t spray with cooking spray as it makes these bars greasy. Set aside.
- In a small blender or a food processor, pulse the pitted dates to create a very thick and sticky paste. This takes some patience; stir with a spoon and re-blend as needed.
- Scoop out every last bit of the date paste and add to a large bowl. Add in peanut butter, maple syrup, and vanilla extract. Use a hand mixer to beat until combined.
- Stir in the quick oats, old-fashioned oats, mini chocolate chips, and coarsely chopped pistachios. (If the pistachios and peanut butter aren’t salted, add a scant 1/4 teaspoon salt too.) Mix until thoroughly combined. If needed, knead the mixture with your hands to get a well-combined and incorporated mixture.
- Transfer the mixture into the prepared 8×8-inch baking pan and very firmly press the mixture into an even layer. Use the bottom of a flat 1 cup measuring cup to help firmly press. Set aside.
- Optional Chocolate Topping: In a large, microwave-safe bowl, combine the chocolate chips and coconut oil (measured when the oil is in a hardened state). Microwave in bursts of 15 seconds, stirring between each burst for 15 seconds, until melted and smooth.
- Pour melted chocolate evenly over the bars and tip the pan around to create an even layer of chocolate on top. Cover and refrigerate until the chocolate is completely set.
- Using the parchment-paper overhang, remove the bars from the pan and cut into equal-sized bars. Store leftover bars in the fridge, covered, for up to 1 week.
Notes
- 1. Pitted dates can be sticky; use a small amount of water on your hands when handling.
- 2. Ensure pistachios are coarsely chopped for the right texture.
- 3. Use mini chocolate chips for a different texture and melt-in-your-mouth experience.
- Prep Time: 15 minutes
- Cook Time: 0 minutes
- Category: Snacks
- Method: No-Bake
- Cuisine: American
Nutrition
- Serving Size: 1 bar
- Calories: 180
- Sugar: 12g
- Sodium: 50mg
- Fat: 9g
- Saturated Fat: 2g
- Unsaturated Fat: 7g
- Trans Fat: 0g
- Carbohydrates: 22g
- Fiber: 3g
- Protein: 4g
- Cholesterol: 0mg